


The Workshop Zone
A dusty place where stone begins to flow,
forms begin to grow,
and Moments of Movement are captured.
The engine room of the whole process, the place where I wonder if the piece is going to look alright, a place seeming
eternally bathed in dust, and none to warm in winter either, although the move back to Nelson certainly helped and
the subsequent move to the Coromandel not too much different to Nelson........ it’s wetter though.
However the whole process is pretty straight forward in principal, draw something, remove the obvious excess bits
then smooth up what's left, trusting that insights as to future progress will follow. A flippant description you might
think, BUT the biggest problem anyone is going to have carving stone has nothing to do with the stone itself. It's head
stuff so to speak, the only truly limiting factor, you can change that if you want to....... Discard the head stuff, all
those “I am not” and “I don’t know how’s” and the like and let something flow.

<<<<<<...... “Head Stuff”
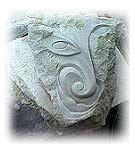
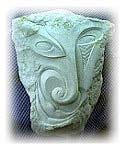
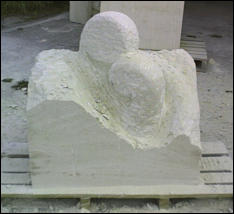
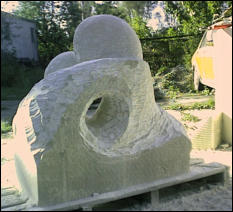
The images above and below demonstrate the process nicely and in order of events. As a basic principal it helps to
draw something, anything will do, that's your focus, (a tip, if you use a sealer on your pencil drawing it has a better
chance of surviving subsequent actions). Start by removing the stone that obviously should not be there, this way at
any one point you will have "something" definable to work with, (but don't let on to anyone what it is, even if you
can see it yourself).
Forget what it "should" look like, it probably won't at first, but if you consistently remove the "well that shouldn't
be there" bits, then the work will evolve to creation......... If pushed you can always call it modern art.
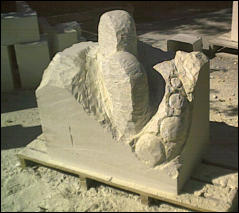
A sketch on a piece of paper would be a good idea for many, even the worst sketch can turn into something quite
impressive in 3D. All in all it is just a process of continual examining then refinement so the whole piece develops as
a unit.
The despair begins to fade near the end......... trust me on that.
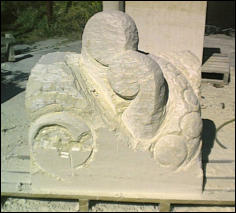
If there is something that hasn't gone quite right, exaggerate it a bit (or lot) so it stands out. I suspect a lot of
modern art works this way. Take the head pic's above, the right eye wasn't coming out well even for this piece, so I
added more detail to draw attention and get you thinking.....

To summarize:
•
Draw the outline as accurately as you can.
•
Make your first cuts to define the basic shape so you have a form to
work with by cutting around the outer edge.
•
Then sculpt out the deeper sections to somewhere close to their
final depth.
•
Work the whole piece, rather than finishing a section at a time.
•
Then just start rounding out a little here and there, getting
progressively finer...............

The Tools
Tool preference is one of those subjective things, not unlike one's preference for particular flavours of icecream. But
I like them all, so if it's got an edge, I'll use it. Not everyone agrees with this principal I note, but I'm sure most will
cotton on to using whatever is at hand, right or wrong just isn't an issue.
For working most of the stone displayed within this site, old wood chisels do the job admirably on this softer stone,
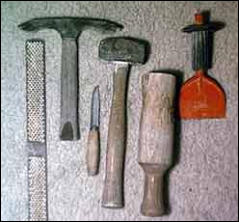
cheap as well. Hammers, just use what fits and doesn't tire you, the harder the stone the heavier the hammer
although a lighter wooden mallet serves well with the softer stone. I prefer a 2.5 lb steel mallet for the most, going
for speed of the hit rather than weight, to do the job.
A good farriers rasp or wood rasp is a handy thing for shaping larger flat areas and floating around the big curves.
Compressed air is manna from heaven, you can run air tools and the like but for my money, the airgun is the most
valuable.
My air supply initially was a fairly simplistic device made from an old truck compressor mounted on an LPG cylinder
for storage. The rest consists of an old electric motor, a couple of pulleys that were floating around the place and I
paid money for the hoses. It works a treat, sounds the part, (complete with a car muffler to quieten the intake),
looks................ well just like something I threw together, funny that, these days I have a compressor from the local
hardware shop.
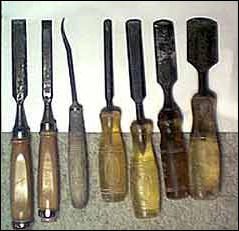
Notice that some of the chisels have rounded ends, I've done this because
it seems to help prevent excessive stone breakout as well as decreasing
the amount of score marks by creating a tapered lead in on the cut.
Also handy for creating curved surfaces when used as a scraper. I also use
the occasional V wood chisels which are good for the broad outlining of
forms particularly if the pencil outine is in danger of getting lost.
Weighty things for getting the point across, a rasp, my prized knife,
(somewhat shorter these days). It has a laminated steel blade and holds
it's edge forever.
The knife is my tool of preference for most things, with me being strong
of wrist there is little I can't do with it, and that gives a hint or two about
the hardness of the stone.
The big hammer is for serious removal, wooden mallet for the more
delicate shaping. The axe didn't quite fit in the picture......
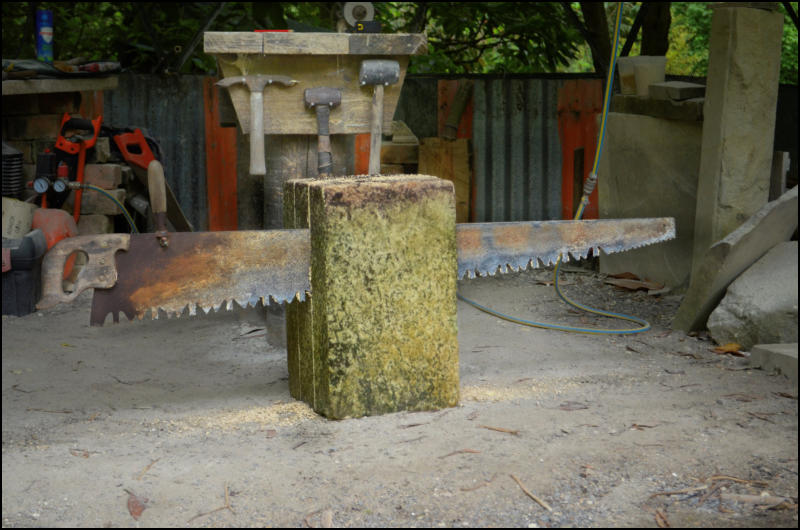
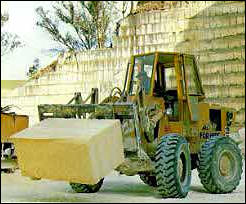
I also cut the big blocks with an old large toothed crosscut saw about 5
foot long. They even have stone cutting races in this part of the world
with these.....
As well as the above, on my workbench will be an assortment of well used emery cloth and sandpapers, a multitude
of pencil stubs, a large toothed hand saw, an empty coffee cup, and rubble.
It's messy work and you should wear a mask and goggles.....
So there are no great secrets to share. The GOD of SCULPT demands little more than a token face full of dust from
time to time, (unlike the GOD of MECHANIC who always seems to call for blood and crossed threads).
There is not a lot I can say about design either as it never came easy for me. Some will tell you they are releasing
what is already in the stone but I prefer the creator approach.
I decide, so it is........
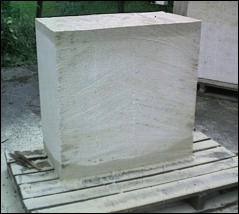
The Stone
There two types of stone I currently use:
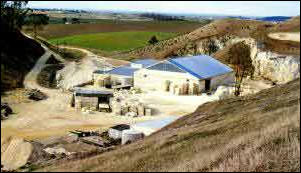
#1 My favourite is used in buildings throughout New Zealand, both young and old, it has created and enhanced many
fine old buildings. It is a variety of Limestone known in geological circles as "Totora Limestone", but most commonly
as Oamaru Stone. It is quarried from NZ's only limestone quarry producing building stone.
Laid down in the warm seas of 35-40 million years ago it is formed mainly of sand-sized bryozoan fragments containing
large numbers of micro fossils and very occassionally larger molluscs, brachiopods, corals, and echinoderms.
PARKSIDE QUARRIES have been mining it since 1906 and is renowned for producing fine grained, even textured stone,
free from joints and impurities, making it a premier building material. These qualities combined with it's rich cream
hues, make it a superb sculpting stone as many a New Zealand sculptor will tell you. For the most part, in my opinion,
it is best suited to larger works, the bigger the better, as it doesn't take fine sharp detail well. Not that this wee fact
stops me from making many small pieces.......
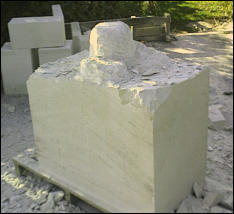
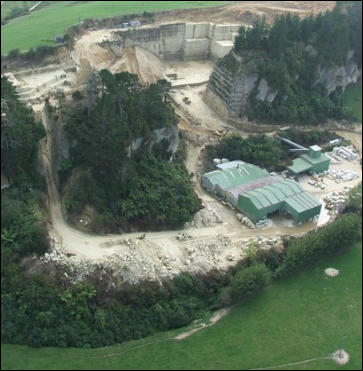
#2 The stone the only local stone I currently have
available, Hinuera Stone from a quarry nearish to
Hamilton. It is of volcanic origin largely the compressed ash
deposits from a few 10’s of thousand years ago. It is
quarried for all manner of building and landscaping uses. It
varies in hardness from really soft to elbow jarring hard, I
tend towards the middle ground.
Being high in silica content it is hard on the tools I use for
the Oamaru Stone despite working in a similar manner. High
carbon steel tools would be a better choice. An attractive
stone in buildings and landscape features but tends a bit
gray and lifeless to my eye when used for sculptural
purposes, not necessarily a bad thing that...... it just
means a touch more effort in self to get the “feel” right as
it is a young stone and you are working to give it life.
Stone Finishes
A whole subject in itself. In outside use for this softer, more porus, stone I use one of several treatments
depending on the requirements.
•
A water based silicone sealer that repels water yet allows the stone to breathe. If the work is outside in a
cold climate internal water can freeze and blow lumps off the sculpture even with a silicone sealer.
•
An aliphatic resin glue diluted with water to form a relatively tough finish, it soaks right into the stone with
discolouring it.
•
Resin glue with a silicone finish
•
Nothing at all if I want the stone to "green-up" and get a live look.
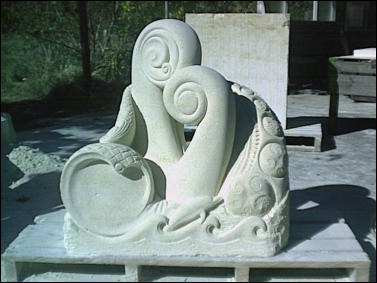
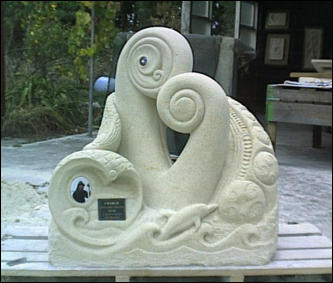
This piece I designed in a very broad sort of way, on paper first, then..............
I started hitting it with an axe, albeit a small one, interspersed with a chisel or two...........
and slowly a form developed, inventing it as I went by developing the "feel" of it............
which was dictated in part by the purpose of the piece, a memorial to Charlie.............
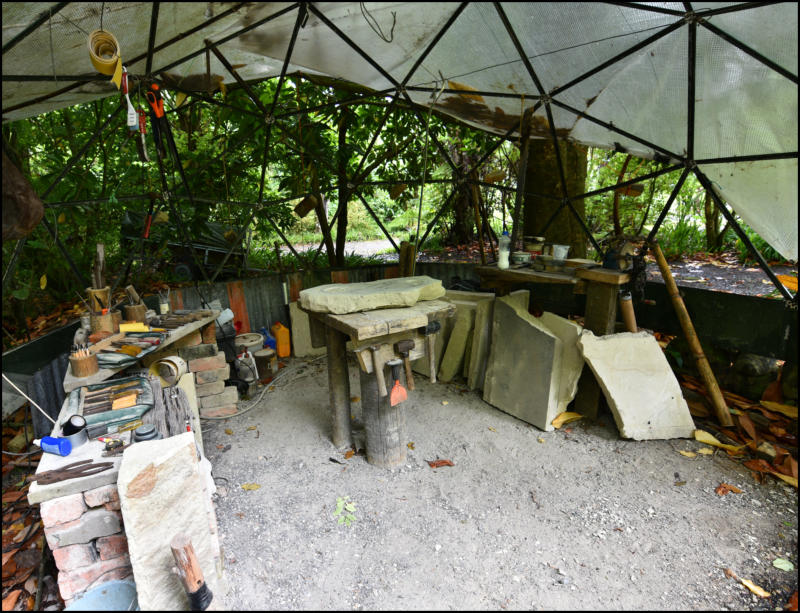
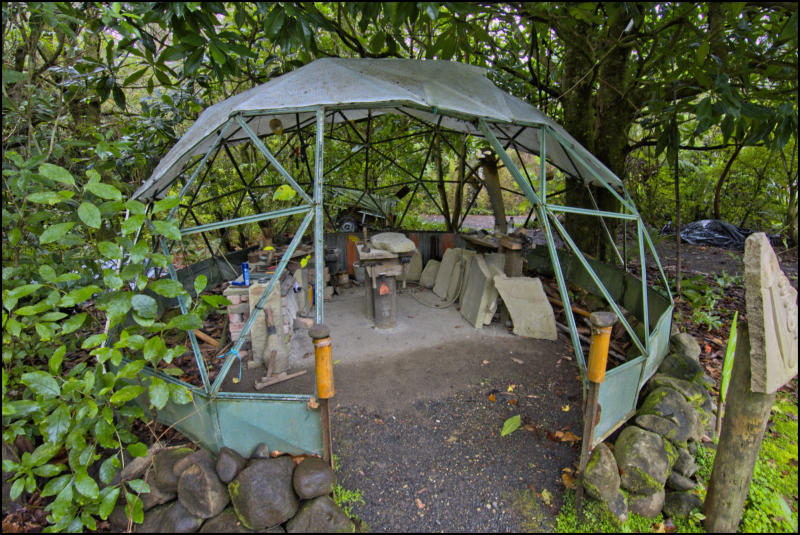
Current Workshop Space - with emphasis on space.
This is the space I now work in, created in my usual style of using what was available without toooo much effort then
fine tuned as needs changed. It caters for good ventilation (particularly in winter), main lighting is from the sides to
accentuate the detail, cool in summer, even cooler in winter........ and great 360 degree views.
There is a central table for the stone slabs, small enough for me to move around them as detail and lighting dictates.
An air compressor for blowing dust and chips, a hand grinder for quick chisel sharpening, and a music system to
infiltrate the surroundings with soft sounds to sooth......... oh yes and a good supply of mosquito coils.
Click on the images for larger versions
As you get towards the end and are trying for a bit of flow and finish:
•
use directional light to highlight the ups and down of it all.
•
sight your work surface against a background to get a sense of whether it needs more smoothing or shaping.
•
Look along any surface instead of down at it occasionally as this will exaggerate any imperfections by
foreshortening them.
•
Be prepared for imperfections, (meditation may help at this point) The biggest secret of all is probably the
old carpenters maxim, "If you can't hide it, make a feature of it", trust me this works also.